Windows.Forms and Mac OS/X
I decided to create a step-by-step tutorial on how to get Windows.Forms based PC apps running on Mac OS/X. As an outsider to the project, I'm going to restrict myself to public releases.
Prerequisites:
Before we begin, we need to check the minimum system requirements:
- Mac OS/X Panther 10.3.x (I used 10.3.8)
- X11 for Mac OS/X ( this is an install option for Panther located on the third CD ). This requirement may go away in the future but for now just make sure you have it installed.
Step 1: Get Mono

Download Mono.Framework-1.1.6.dmg from the Mono website (http://www.mono-project.com/Downloads).
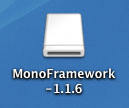
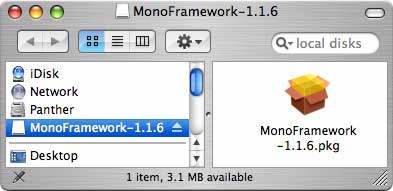
Double click on the .dmg file to mount the disk image. A drive icon like the one above should now be on your desktop. Double click on the drive in order to see it's contents.
Step 2: Install Mono
Double click on the package file. This will start an installation of Mono onto your hard drive.
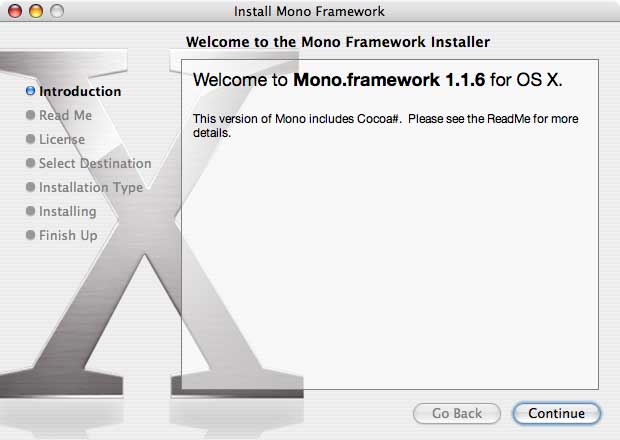
You need to follow the instructions and complete the installation. Once you are done, you will be ready to begin writing your first Mac Windows.Forms "Hello World" program.
Step 3: Creating Hello World
In this step, we will be creating a simple Message Box based program to test our installation. Start TextEdit and lets write a simple C# Windows.Forms program.
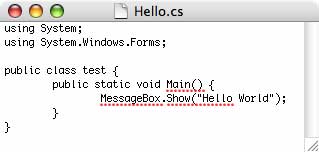
This program won't win any design awards but it will create a Message Box with a text message (the ubiquitous "Hello World"), and an OK button. Make sure that when you save this file that you don't add a .txt extension to the file!
We now need to compile this simple program. We need to start Terminal in order to do this. Launch Terminal and change your directory to the directory that you saved your Hello.cs file to. I saved it to a subdirectory of "Documents" so at the command prompt I typed:
cd ~/Documents/Hello
You'll need to do something similar.
we can now launch the compiler. At the prompt, type:
mcs Hello.cs /r:System.Windows.Forms.dll /out:Hello.exe
If you didn't make any typing errors, you should now have Hello.exe in addition to Hello.cs.
If this was a PC, we would be done now but since we are on the Mac, we need another step. We need to MacPack the exe we created so that it can play nice with the Mac's GUI. Type the following command at the same prompt you used to compile.
macpack -n:Hello -a:Hello.exe -o:. -m:1
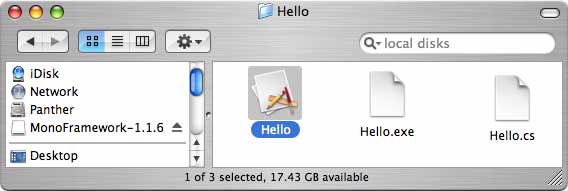
This will create a Mac bundle that contains our sample and that can be launched by clicking on it in the finder.
Step 4: Hello World
Clicking on the Hello App in the finder should give you the following message box.
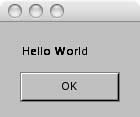
Clicking the OK button closes the app.
Addendum: MacPack, an explanation.
Mac Applications exist as App bundles. A bundle is just a subdirectory containing an executable as well as all the resources that the executable may need (such as icons, images, sounds, plugins, help, language packs, etc). In fact, the bundle we created above (called Hello) is really just a subdirectory called Hello.app. These bundles need to conform to a particular structure so that they interact with the finder and dock properly. This is where macpack comes in. It creates the necessary directory tree, a configuration file, and a launch script for your exe.
The finder reads the directory tree and realizes that it is really an App and treats the bundle like a single file. If you want to explore the subdirectory, you need to right click (or Ctrl-click for single button mice) and select "Show Package Contents". This will let you bypass the Mac "magic" and explore the contents of the subdirectory. This magic doesn't exist when you are in terminal. Terminal always shows the App as a directory. The only thing that should be in the root directory of the App is a Contents subdirectory. Inside this subdirectory are the Resources and MacOS subdirectories as well as the Info.plist file.
Info.plist
The Info.plist file configures the bundle. Double clicking on it should launch the property list editor. There are two entries created by default when you use macpack. CFBundleExecutable specifies which executable (located in the MacOS sub) should be run when the app is launched. CFBundleIdentifier specifies what name should be displayed for this app in the finder. There are a few others that you might like to use.
Custom Icons
First, you may want to use a custom icon. Create a new Hello.icns file using Icon Composer (part of the XCode Developer tools, another optional install included with Panther) or just borrow an icon from the Resources section of another App. Copy this file to the Resources section of Hello.app and add a new entry to the Info.plist file where key=CFBundleIconFile and value=Hello.icns (or whatever it is called). You now need to force the finder to update it's picture for this app. Dragging the app to the desktop and then back again should do it. Making a duplicate of the App also works.
"APPL" status
Your app is ALMOST a fully fledged Mac App. One thing it can't do, however is get dragged to the dock. That's because the dock doesn't know that it is an App. There are many bundle types used by Panther and an App is only one of them. Frameworks are also bundles. So are installation packages. Obviously it doesn't make sense to drag a framework (like Mono.Framework, for instance) to the dock so we need to tell the Dock that this bundle is really an App. We do this by adding another entry to the Info.plist file where the key=CFBundlePackageType and the value="APPL" (for application). Once you have done this, your app can now be dragged to the dock like any other Mac App.
Epilogue:
The astute among you will realize that although I stated that X11 was a requirement, we didn't actually do anything with it. It does not even need to be running for S.W.F apps to work. This is because, as it has been explained to me, the only part of X11 that is being used is in the text rendering. This means that it is theoretically possible to remove the X11 requirement in the future. As you can see from the screenshot, the X11 rendering is far from exceptional. Also, I have been told that S.W.F on Mac is still considered to be in the Alpha stage. Therefore, not all S.W.F apps will run flawlessly. My advice is to not rely on full S.W.F functionality until at least beta :)
Oscar
Prerequisites:
Before we begin, we need to check the minimum system requirements:
- Mac OS/X Panther 10.3.x (I used 10.3.8)
- X11 for Mac OS/X ( this is an install option for Panther located on the third CD ). This requirement may go away in the future but for now just make sure you have it installed.
Step 1: Get Mono
Download Mono.Framework-1.1.6.dmg from the Mono website (http://www.mono-project.com/Downloads).
Double click on the .dmg file to mount the disk image. A drive icon like the one above should now be on your desktop. Double click on the drive in order to see it's contents.
Step 2: Install Mono
Double click on the package file. This will start an installation of Mono onto your hard drive.
You need to follow the instructions and complete the installation. Once you are done, you will be ready to begin writing your first Mac Windows.Forms "Hello World" program.
Step 3: Creating Hello World
In this step, we will be creating a simple Message Box based program to test our installation. Start TextEdit and lets write a simple C# Windows.Forms program.
This program won't win any design awards but it will create a Message Box with a text message (the ubiquitous "Hello World"), and an OK button. Make sure that when you save this file that you don't add a .txt extension to the file!
We now need to compile this simple program. We need to start Terminal in order to do this. Launch Terminal and change your directory to the directory that you saved your Hello.cs file to. I saved it to a subdirectory of "Documents" so at the command prompt I typed:
cd ~/Documents/Hello
You'll need to do something similar.
we can now launch the compiler. At the prompt, type:
mcs Hello.cs /r:System.Windows.Forms.dll /out:Hello.exe
If you didn't make any typing errors, you should now have Hello.exe in addition to Hello.cs.
If this was a PC, we would be done now but since we are on the Mac, we need another step. We need to MacPack the exe we created so that it can play nice with the Mac's GUI. Type the following command at the same prompt you used to compile.
macpack -n:Hello -a:Hello.exe -o:. -m:1
This will create a Mac bundle that contains our sample and that can be launched by clicking on it in the finder.
Step 4: Hello World
Clicking on the Hello App in the finder should give you the following message box.
Clicking the OK button closes the app.
Addendum: MacPack, an explanation.
Mac Applications exist as App bundles. A bundle is just a subdirectory containing an executable as well as all the resources that the executable may need (such as icons, images, sounds, plugins, help, language packs, etc). In fact, the bundle we created above (called Hello) is really just a subdirectory called Hello.app. These bundles need to conform to a particular structure so that they interact with the finder and dock properly. This is where macpack comes in. It creates the necessary directory tree, a configuration file, and a launch script for your exe.
The finder reads the directory tree and realizes that it is really an App and treats the bundle like a single file. If you want to explore the subdirectory, you need to right click (or Ctrl-click for single button mice) and select "Show Package Contents". This will let you bypass the Mac "magic" and explore the contents of the subdirectory. This magic doesn't exist when you are in terminal. Terminal always shows the App as a directory. The only thing that should be in the root directory of the App is a Contents subdirectory. Inside this subdirectory are the Resources and MacOS subdirectories as well as the Info.plist file.
Info.plist
The Info.plist file configures the bundle. Double clicking on it should launch the property list editor. There are two entries created by default when you use macpack. CFBundleExecutable specifies which executable (located in the MacOS sub) should be run when the app is launched. CFBundleIdentifier specifies what name should be displayed for this app in the finder. There are a few others that you might like to use.
Custom Icons
First, you may want to use a custom icon. Create a new Hello.icns file using Icon Composer (part of the XCode Developer tools, another optional install included with Panther) or just borrow an icon from the Resources section of another App. Copy this file to the Resources section of Hello.app and add a new entry to the Info.plist file where key=CFBundleIconFile and value=Hello.icns (or whatever it is called). You now need to force the finder to update it's picture for this app. Dragging the app to the desktop and then back again should do it. Making a duplicate of the App also works.
"APPL" status
Your app is ALMOST a fully fledged Mac App. One thing it can't do, however is get dragged to the dock. That's because the dock doesn't know that it is an App. There are many bundle types used by Panther and an App is only one of them. Frameworks are also bundles. So are installation packages. Obviously it doesn't make sense to drag a framework (like Mono.Framework, for instance) to the dock so we need to tell the Dock that this bundle is really an App. We do this by adding another entry to the Info.plist file where the key=CFBundlePackageType and the value="APPL" (for application). Once you have done this, your app can now be dragged to the dock like any other Mac App.
Epilogue:
The astute among you will realize that although I stated that X11 was a requirement, we didn't actually do anything with it. It does not even need to be running for S.W.F apps to work. This is because, as it has been explained to me, the only part of X11 that is being used is in the text rendering. This means that it is theoretically possible to remove the X11 requirement in the future. As you can see from the screenshot, the X11 rendering is far from exceptional. Also, I have been told that S.W.F on Mac is still considered to be in the Alpha stage. Therefore, not all S.W.F apps will run flawlessly. My advice is to not rely on full S.W.F functionality until at least beta :)
Oscar
posted by Oscar Papel at
4:49 PM
![]()
![]()


2 Comments:
Nice Work.
I have been trying to get System.Windows.Forms apps to run on my mac, and i found out that i downloaded 1.1.6 the day before it was found out that libgdiplus.dylib wasn't included.
Anyway, i didnt know about that macpack app, so thank's for that.
Also, in the future (or currently) does (will) libgdiplus.dylib interface with Quartz?, cause that would provide smoothed text rendering, and vector drawing.
By The_Decryptor, at 12:52 AM
libGDIplus uses (among others) Carbon as a backend and so could access Quartz that way.
It is still in Alpha stage and I'm not the developer working on it so I really can't speak for anyone else. I would guess that the X11 dependancy is a temporary one.
By Oscar Papel, at 9:49 AM
Post a Comment
<< Home